 Acadia Learning brings scientists, teachers, and students together in partnerships that result in useful research and effective science education.
Now what do we do with these bags of bugs/hair/dirt/leaves/critters???
Guide to sample submission for the Acadia Learning Project.
You can have up to 20 samples analyzed by the lab. Once you have developed hypotheses and figured out what those 20 will be, here’s what to do:
1. Sample Storage.
Your samples should be stored in a freezer. Do not take them out until you’re ready to deal with them, then return them to the freezer as soon as you’re done sorting & labeling.
2. Sample Preparation.
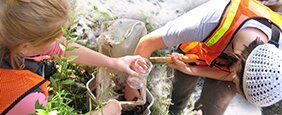
a) Using clean methods (gloves) when appropriate, put each thing1 in its own Ziploc bag, LABELING EACH THING on the outside of the bag with a permanent marker. The label should be a unique identifier for each thing. Now, we will call each thing a sample. You should end up with 20 samples or less.
b) If you are going to do anything to your samples, Step a is the time. For example, if you want to analyze the head of an invert separately from the rest of its body, you need to split the head and body and put them in separate bags. The lab will put whatever is in a single bag into the instrument as a sample – they will not be dissecting, mixing, grinding, or otherwise preparing your samples. Put in the bag EXACTLY what you want analyzed.
c) The person at the lab who will analyze your samples will NOT be any of the scientists working on the project. It will be a lab staffer. This person has essentially no idea what you are doing or why – and they might have no idea what a dragonfly looks like as compared to a mayfly. So you and your class are in charge of knowing what you are sending in. The only way you can track your samples is to know what you are sending in, what you are calling the samples (that unique identifier), and what they are (your own words describing what you’re sending).
|
1 A ‘thing’ can be a single bug, several bugs together, a fish muscle plug, bug wings, a crayfish tail, a leaf, several leaves torn into small bits & mixed together, a group of hairs, a small chunk of soil. Whatever you’ve sampled, the ‘thing’ we reference here is the exact item in which you want to know mercury content. Whatever you are planning to have analyzed, have it – and only it – in a bag, all by itself. For example, you might have two samples that you know as
…but these are not very good unique identifiers for the lab. For the sake of brevity, label your bags: Maple‐1 and Cedar‐1. Then go from there with your other samples (up to 20, so you might add Maple‐2, Oak‐1, Cedar‐2, Cedar‐3, etc.). |
d) Now that you have your 20 or fewer samples all bagged and labeled, put the 20 bags into another Ziploc bag (or a couple bags, if they don’t fit). They’re now double‐bagged.
3. Sample Transfer.
a) Fill out a chain of custody form (click to download Excel file). This form tells the lab what you are submitting – again, they don’t know what we’re doing, so you need to give them the information.
b) Contact Acadia Partners scientist Sarah Nelson to arrange for samples to be dropped off (by you), picked up (by us), or FedExed. It is important that I can give the lab a heads‐up when things are arriving – especially since we don’t want them to defrost.
c) Whether samples are to be dropped off, picked up, or shipped, they’ll need to be delivered in a cooler with ice. The cheapest way to get ice is to make it in an empty soda bottle filled with water & put in a freezer. That will keep things cold enough for a short car ride or FedEx trip. Sarah will give specific details for each teacher’s situation – but be ready with the ice and a small cooler (which we will return).